What Happens After You Find Mold — A Step-by-Step Guide
Finding mold is unsettling. Knowing exactly what to do next makes it manageable. Here is the process, in the order it should happen.
Finding mold in your home is unsettling. Most people’s first instinct is to clean it — grab a spray bottle, scrub the surface, and move on. That instinct is understandable, but in most cases it makes the problem worse rather than better. Disturbing mold growth without proper containment disperses spores into the air and into adjacent spaces, spreading contamination that was previously localized.
The good news is that there is a clear, established process for handling mold — and once you understand it, the situation becomes significantly less overwhelming. Here is what actually happens after you find mold, in the order it should happen.
Step 1: Stop. Don't Touch It.
Before anything else — do not scrub it, do not spray it with bleach or household cleaners, and do not point a fan at it. Each of these actions can aerosolize mold spores and distribute them through your home’s air supply.
The EPA’s mold remediation guidelines are clear on this point: surface cleaning with household products may remove visible mold temporarily but does not address growth that has penetrated into porous materials like drywall, wood framing, or insulation. In most cases it simply moves the problem rather than resolving it.
Take photographs of what you found — location, size, surface type — and document when you first noticed it and whether anything preceded it (a leak, a flood, a period of high humidity). This documentation matters later.
Step 2: Call a Licensed Mold Assessor
In Florida, mold assessors and mold remediators are required to be separately licensed, and the same company cannot perform both the assessment and the remediation on the same property. This separation exists to protect property owners — it ensures that the person defining the scope of the problem has no financial interest in the remediation work that follows.
A licensed mold assessor will:
- Conduct a thorough visual inspection of the affected areas and any areas likely to be connected
- Collect air and surface samples for laboratory analysis
- Identify the mold species present and the concentration levels
- Document the full extent of the contamination, including areas that are not visibly affected but show elevated moisture or spore counts
- Produce a written assessment report that becomes the basis for the remediation scope
The Florida Department of Business and Professional Regulation (DBPR) maintains licensing requirements for mold assessors and remediators in the state. When hiring an assessor, confirm their license is current and that they are operating as assessor only — not offering to perform the remediation themselves.
If you don’t have an assessor contact, search the NORMI Trained Professional Directory to find a certified assessor in your area, or reach out to FPT Environmental directly — we’ll point you in the right direction.
Step 3: Get the Assessment Done
The assessment visit typically takes one to several hours depending on the size of the property and the extent of the affected area. Air samples are collected from the affected rooms, from other areas of the property, and from an outdoor location as a baseline control. Surface and bulk material samples may also be collected depending on what the visual inspection indicates.
All samples are submitted to an accredited third-party laboratory for analysis. Results typically return within a few business days and identify the mold species present, the spore concentrations in each sampled location, and how those concentrations compare to the outdoor baseline.
The assessor then reviews the laboratory findings and produces a written assessment report — the document that describes what was found, where, at what levels, and what it means for the property and its occupants.
Step 4: Review the Findings and Receive an Action Plan
Once the assessment report is complete, the assessor will walk you through the findings. This conversation should cover:
- What species of mold were identified and what is known about their health significance
- Which areas of the property are affected and to what extent
- Whether remediation is recommended and what the general scope involves
- What conditions (moisture sources, ventilation issues, building envelope failures) contributed to the growth and need to be addressed alongside the remediation
If remediation is required, the assessor produces a written scope of work — a formal document specifying exactly what needs to be done, which materials need to be removed or treated, what containment and safety protocols are required, and what verification testing must be performed at the end of the project.
This scope of work is the document that remediators bid against and that insurance carriers use to authorize payment. It is not the same as a contractor’s estimate.
Step 5: Select a Licensed Remediator
With the assessment report and scope of work in hand, you can now engage a licensed mold remediator to perform the work. In Florida, mold remediators must hold a current license issued by the DBPR. Confirm this before engaging anyone.
The remediator should work strictly from the assessor’s scope of work — not substitute materials, modify procedures, or expand or reduce the scope without documented justification and assessor approval. Any changes to the scope during the project should be communicated to the assessor, not handled informally in the field.
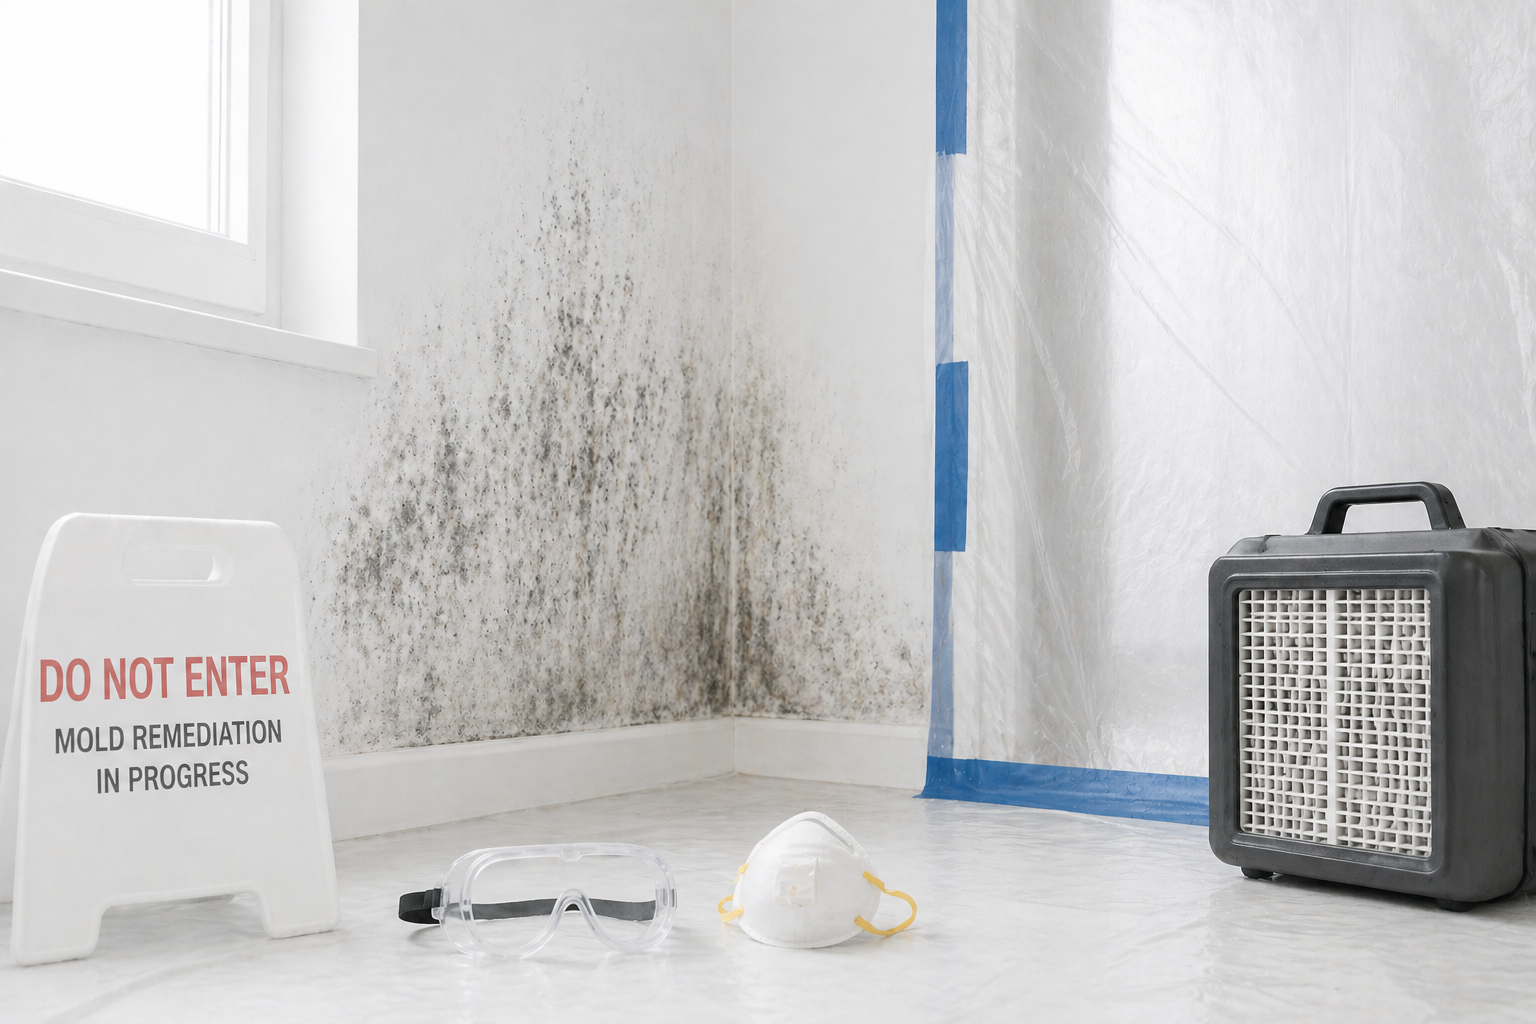
During remediation, the work area is isolated with containment barriers and negative air pressure to prevent cross-contamination to clean areas of the property. HEPA air scrubbers run continuously to capture airborne spores during the work. Affected materials are removed and disposed of according to applicable regulations.
The IICRC S520 Standard for Professional Mold Remediation is the primary industry standard governing how mold remediation is conducted. A competent remediator will be familiar with it and work in alignment with it.
The American College of Occupational and Environmental Medicine (ACOEM) recognizes dampness and microbial contamination in buildings as a documented cause of respiratory symptoms, including worsening of asthma, persistent cough, eye and throat irritation, and fatigue. These symptoms are produced not only by mold spores but by the MVOCs and mycotoxins that contaminated building materials release into the indoor air.
When a physician has ruled out other causes and the symptom pattern correlates with time spent in the building, a professional indoor air quality assessment is a reasonable and often productive next step.
Step 6: Clearance Testing
Remediation is not complete until clearance testing confirms it. Clearance testing is conducted by the original assessor — or another licensed assessor — after all remediation work has been completed and before any reconstruction or reinstallation of removed materials begins.
A final round of air and surface samples is collected and submitted to the laboratory. The results must confirm that mold spore levels have returned to acceptable ranges before the project is considered closed. If the results do not meet clearance standards, additional remediation is required before retesting.
You receive the clearance report as a permanent, documented record that the remediation was completed to the required standard. This document is important for insurance purposes and is material information for any future sale of the property.
A Note on Insurance
Whether mold remediation is covered by your homeowners insurance depends on the cause and your specific policy. Mold resulting from a sudden and accidental water damage event — a burst pipe, an appliance failure, storm-related intrusion — is often covered. Mold resulting from long-term neglect or gradual moisture accumulation typically is not.
Document everything throughout this process: the assessment report, the scope of work, the remediation contractor’s work records, and the clearance report. Your adjuster will need this documentation to process the claim, and having a complete record protects you if any aspect of the claim is disputed.
The Process Works When It's Followed in Order
The most common reason mold problems recur or escalate is that one of these steps is skipped — usually the assessment, replaced with a contractor’s visual inspection, or the clearance testing, assumed to be unnecessary once the visible mold is gone.
Each step exists for a reason. Assessment establishes what you are actually dealing with. The scope of work ensures the right thing gets done. Clearance testing confirms it was done correctly. Skipping any one of them produces uncertainty at exactly the moment when documented certainty is most valuable.
If you have found mold in your property and are not sure where to start, FPT Environmental can help you understand the process and connect with the right resources for your situation. Contact us here.
FPT Environmental LLC provides mold remediation, moisture mapping, indoor air quality testing, and environmental restoration services throughout South and Central Florida. This article is intended for general informational purposes and does not constitute legal or insurance advice.
Quick Links
About Us
Academy
Services
Products
Financing
Resources
Academy Policy
Privacy Policy
Refund Policy
Let’s Stay Connected
Join our mailing list for expert insights, seasonal property protection strategies, and updates on the latest in indoor air quality technology directly from FPT Environmental.